
7 min to read
BEM
Savior Methodology
Hello friends! How are you? Today I want to share with you some theoretical concepts and practical examples to be able to apply the magic methodology BEM, its advantages and disadvantages!

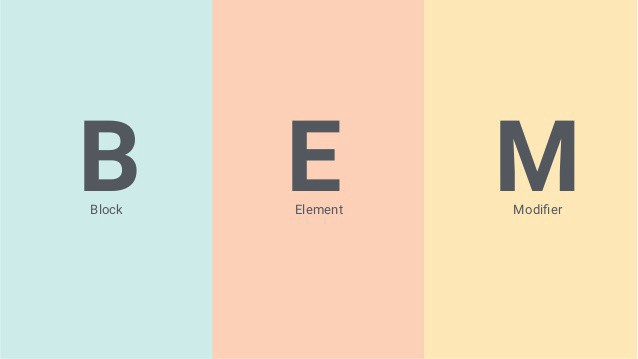
Well as some may already know, BEM is the methodology that has been applied lately with respect to HTML&CSS, let’s see first what it means: Block Element Modifier. It refers to component-based web development. Why? The idea is precisely to treat the interfaces that we must lay out and develop as independent blocks. This not only makes the development and layout simpler, but also makes it reusable and scalable to other components and interfaces that need to be developed, even in complex designs.
Block
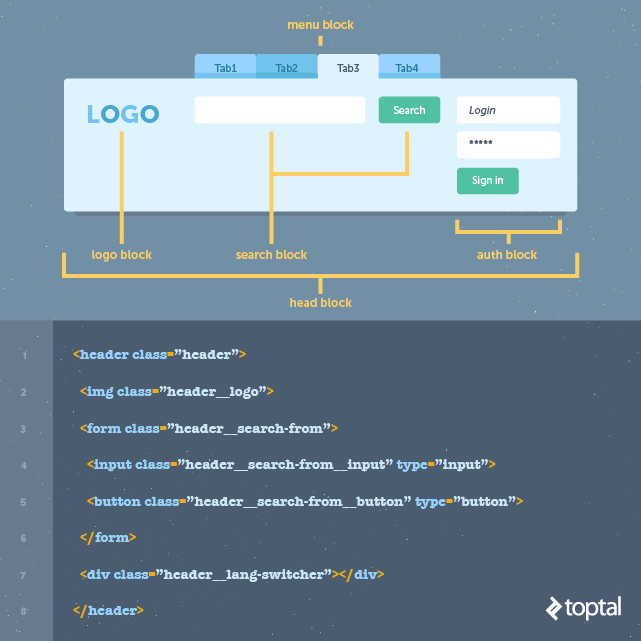
 The block or box we are going to choose always has to answer the question of What it is and not what it does or what it looks like. What is it? A header, a button, a menu, a form, etc.
Nesting: Blocks may or may not be nested, they are independent. And they may or may not have elements. Example:
<div class="logo"></div>

<form class="search-form"></form>
We translate this into two blocks, a logo and a search form. And the selector class that we are going to use for each block is logo and search-form respectively.
Element
The elements must also respond to the What is and does not refer to its status or appearance. But it differs from block, because the element is ALWAYS part of a block. The naming convention in BEM for the element is to have the name of the block followed by a double underscore (__) with the name of the element.
Following the previous example, the reference to elements would look like this:
<form class="search-form">
    <input class="search-form__input">
    <button class="search-form__button">Search</button>
</form>
What we translate as: in the search-form block, we have two elements, an input and a button. And as we said before, we have the search-form class which is the name of our block, and the search-forminput and search-formbutton elements respectively.
Modifier
Now yes, we must think about the state, appearance, behavior, etc of the element or block in question. In this case the modifier instead of a double underscore, has a double middle dash (–) Keeping the example we would have something like:
<form class="search-form">
    <input class="search-form__input">
    <button class="search-form__button search-form__button--disabled">Search</button>
</form>
As we can see, the button has the modifier “–disabled”, and here I want us to emphasize as well, always in the modifiers we need to repeat the name of the element so that the modifier can be applied. Let’s pay attention here: search-form__button search-form__button--disabled
Why are we doing this? Because the modifier is intended so that we can alter certain aspects and details of the element, so we need to inherit the styles of the element, and only apply the difference. Now with the CSS we are going to see it better.
In addition to modifying elements, we can also modify blocks, for example if we want a special “theme” for the form block, we can do something like this:
<form class="search-form search-form--dark">
    <input class="search-form__input">
    <button class="search-form__button">Search</button>
</form>
With the search-form–dark we would indicate that we have a modifier, in our CSS it would be something like: .search-form { … background-color: white;
  &--dark {
    background-color: black;
  }
}
With that we would be inheriting the styles of the form, but also, in this case we would step on the background color, we could step on any other rule or even add new rules for our modifier.
Now that we have these concepts a little clearer, I want us to see some images that will help us settle a little better, with visual memory, what we saw until recently:

One lasttt but not leastt thing, having multiple elements in a block doesn’t mean we should have strings and strings of double dashes and levels everywhere, we should avoid this: blockelemelemelemelem
In our happy coding experiences, we sometimes find cases that could lead to confusion:
<div class="block">
    <div class="block__elem1">
        <div class="block__elem2">
            <div class="block__elem3"></div>
        </div>
    </div>
</div>
That an element belongs to another does not mean that we should nest it with the **, what matters most to us is that the block has all those elements and that those elements are part of that block, no matter where they are hierarchically. That is why in the example we are putting the names of each element without forming chains and hierarchy levels, we only care about knowing the name of the **element and the block to which it belongs. With this we avoid what we saw before, the endless levels of __ __ __ __ __ oh no oh no oh no no noooooooooooooooo
![]()
What we are interested in is the hierarchical levels between blocks, not between elements, in general we should not nest too many, perhaps by setting a limit of 2 or 3 levels, we can maintain readability and simplicity in the nomenclature. If we notice that we are nesting too much, it is time to reflect on whether they are really blocks, whether we are properly relating the blocks and elements, and in that case, if we start to componentize those blocks, so that the html of that component has its own BEM.
If we think about the CSS of the previous example, it would be something like this:
.block {}
.block__elem1 {}
.block__elem2 {}
.block__elem3 {}
Or better yet, using SASS: .block { &elem1 {} &elem2 {} &__elem3 {} }
This allows us to see an advantage, it allows us to change the DOM structure of blocks without having to change each code of each element. Let’s see an example, if we change the previous example for this other HTML:
<div class="block">
    <div class="block__elem1">
        <div class="block__elem2"></div>
    </div>
    <div class="block__elem3"></div>
</div>
We see that we take element 3 out of elements 2 and 1 that we had before. So we see that our HTML structure changed, BUT since the names didn’t change, neither did their CSS rules, so we won’t need to make modifications to each element, take that cascade.

With all this that we saw some advantages have already come to light in the examples, but there are also more!
Advantages:
- Promotes block independence, we can move and swap blocks or elements within a block without altering styles.
- Simplicity: we can start a project or look at a component that we did not develop ourselves and by simply looking at the HTML we already imagine what the CSS is about without looking at exactly what rules it applies, we can know if it has modifiers and even if there is one that we can reuse for what we need to do.
- It gives us more confidence when making modifications. BEM allows us to understand at a glance the structures and classes of each element and its blocks, so when we need to add or modify certain CSS rules, it will avoid surprises and collateral or cascade effects that can break other elements without realizing it.
- BEM provides us with scalability and flexibility to maintain interfaces and components, as well as reuse blocks, elements or modifiers that need to be shared.
Disadvantages:
- It takes time to learn the methodology.
- The conventions or names can be very long, but the idea is to counteract this with simpler names, without specifying in detail each block and element.
- If it is a small project, it may not make much sense to apply BEM.
If you liked the post and want to see some more examples of BEM, what to do and what NOT to do, here are some recommended readings:
- https://en.bem.info/
- https://seesparkbox.com/foundry/bem_by_example
- https://www.toptal.com/css/introduction-to-bem-methodology
